【Golang】超絶簡素なwebサーバーを作る その3

どうもてぃ。
前回の記事がこちら。
template.htmlを読み込んでstructを渡す形のコードを前回作成しました。
まずはそのコードから見ていきます。
tempalteにstructを渡す
type Article struct {
    Title string
    Body  template.HTML
}

var tpl *template.Template

func init() {
    tpl = template.Must(template.ParseFiles("template.html"))
}

func escapeHTML(html string) (tpl template.HTML) {
    tpl = template.HTML(html)

    return
}

func helloHandler(rw http.ResponseWriter, req *http.Request) {
    article := Article{
        Title: "golang practice",
        Body:  escapeHTML("<h1>hello golang</h1>"),
    }

    if err := tpl.ExecuteTemplate(rw, "template.html", article); err != nil {
        log.Fatalln(err.Error())
    }
}
該当箇所だけ取り上げました。
Articleのstructを定義し、helloHandlerで初期化してます。
func helloHandler(rw http.ResponseWriter, req *http.Request) {
    // ここね
    article := Article{
        Title: "golang practice",
        Body:  escapeHTML("<h1>hello golang</h1>"),
    }、

    if err := tpl.ExecuteTemplate(rw, "template.html", article); err != nil {
        log.Fatalln(err.Error())
    }
}
そして、単にBodyを文字列としてtemplateにわたした際、htmlタグをエスケープしてくれないのでescapeHTML関数を作成し、template.HTMLに変換する処理を入れてます(わざわざ別関数にしなくても良い気がしてきた…)
article := Article{
    Title: "golang practice",
    Body: template.HTML("<h1>hello golang</h1>"),
}
これでいいかも。
だた、この方法はXSSの対象となるやりかたなので、使用する際は十分注意するようにしてください。
エスケープせずうまく出力する方法は以下。
type Article struct {
    Title string
    Body  string
}

var tpl *template.Template

func safeHTMLTemplate(text string) template.HTML {
    return template.HTML(text)
}

func init() {
    funcMap := template.FuncMap{ "safehtml": safeHTMLTemplate }
    tpl = template.Must(template.New("").Funcs(funcMap).ParseFiles("template.html"))
}

func helloHandler(rw http.ResponseWriter, req *http.Request) {
    article := Article{
        Title: "golang practice",
        Body:  "<h1>hello golang</h1>",
    }

    if err := tpl.ExecuteTemplate(rw, "template.html", article); err != nil {
        log.Fatalln(err.Error())
    }
}
Bodyをstringにしてます。 templateのエスケープしない処理部分をinit()に逃がしました。
template側は
<!DOCTYPE html>
<html lang="en">
<head>
  <meta charset="UTF-8">
  <title>{{.Title}}</title>
</head>
<body>
  {{.Body|safehtml}}
</body>
</html>
.Body|safehtmlとすることでhtmlタグのエスケープを気にせず、うまいこと表示を実現してます。
この方法は以下の記事を参考にしました。感謝。
特にセキュリティ意識しなければどちらでも問題ないとは思います。
最初の方がイメージしやすいので、慣れたらtemplate.FuncMap等使ってみると良いかもです。
jsonを返してみる
バックエンドはGo、フロントエンドはReactやVueを使いたい、そんなときGoはjsonを返すのがメインになると思います。
まずは超かんたんにhandlerを作成してみます。
func jsonResponseHandler(rw http.ResponseWriter, req *http.Request) {
    data := map[string]interface{}{
        "message": "hello golang",
        "status":  http.StatusOK,
    }

    // map to json
    bytes, err := json.Marshal(data)
    if err != nil {
        log.Fatal(err)
    }
    fmt.Fprint(rw, string(bytes))
}

func main() {
    // http.Handle("/hello", http.HandlerFunc(helloHandler))
    http.HandleFunc("/hello", helloHandler)
    http.HandleFunc("/dog", dogHandler)
    http.HandleFunc("/json", jsonResponseHandler)

    http.ListenAndServe(":3000", nil)
}
該当箇所をピックアップしてます。requestは特に気にせず、決まったjsonを返す形です。
手順としては…
です。json.Marshal()が今回の味噌。
func Marshal(v interface{}) ([]byte, error) {
    e := newEncodeState()

    err := e.marshal(v, encOpts{escapeHTML: true})
    if err != nil {
        return nil, err
    }
    buf := append([]byte(nil), e.Bytes()...)

    encodeStatePool.Put(e)

    return buf, nil
}
godocを見てみると、Marshalに渡すものは何でもokと(interface型はtypescriptで言うanyみたいなもん)。
深く見る必要はないので、返り値を確認するとbyteとerrorが返ってきてます。
何が返ってくるかはgodocを確認するか、エディタの拡張機能で定義元を確認するようにしてください。自分はvim-goを使ってます。
json.Marshal()を使うだけでjsonをbyte型に変換したものが得られるので、文字列に変換してやると見事にjsonを返すエンドポイントの完成ですb
structを使ったjsonを返してみる
次はmapではなくstructを使って返してみます。
DBからデータを抽出してstructにキャッシュし、それをjsonに変換してレスポンスを返す…みたいなことを想定してます。
type Product struct {
    Name     string `json:"name"`
    Price    int    `json:"price"`
    Quantity int    `json:"quantity"`
}

func productResponseHandler(rw http.ResponseWriter, req *http.Request) {
    // product := Product{"商品A", 100, 10}
    product := Product{
        Name:     "商品A",
        Price:    100,
        Quantity: 10,
    }

    // struct to json byte
    // bytes, err := json.Marshal(product)でもおk
    bytes, err := json.Marshal(&product)
    if err != nil {
        http.Error(rw, err.Error(), http.StatusInternalServerError)
        return
    }

    rw.Header().Set("Content-Type", "application/json")
    fmt.Fprint(rw, string(bytes))
}
また、追加部分だけ抜き出してます。
こう見ると、ほとんどmapのときと同じです。json.Marshal()をしてやるだけ。structの場合ポインタを渡すことが多いので、&productでわたしてます。
他にheader情報を付与したりhttp.Error()で明示的にエラーが出るようにしてますが、mapのときと同じ構成でも問題なく動きます。
ポイントはstructの定義の際に、json指定をしてあげること。
type Product struct {
    Name     string `json:"name"`
    Price    int    `json:"price"`
    Quantity int    `json:"quantity"`
}
これを指定しないと何が返ってくるかというと

ちゃんとjsonになってくれません。
structでレスポンスを返す場合は必ずjson指定をしましょう。
おわり
全体を通したコードがこちら
package main

import (
    "encoding/json"
    "fmt"
    "html/template"
    "log"
    "net/http"
)

type Article struct {
    Title string
    Body  string
}

type Product struct {
    Name     string `json:"name"`
    Price    int    `json:"price"`
    Quantity int    `json:"quantity"`
}

var tpl *template.Template

func safeHTMLTemplate(text string) template.HTML {
    return template.HTML(text)
}

func init() {
    funcMap := template.FuncMap{
        "safehtml": safeHTMLTemplate,
    }
    tpl = template.Must(template.New("").Funcs(funcMap).ParseFiles("template.html"))
}

func helloHandler(rw http.ResponseWriter, req *http.Request) {
    article := Article{
        Title: "golang practice",
        Body:  "<h1>hello golang</h1>",
    }

    if err := tpl.ExecuteTemplate(rw, "template.html", article); err != nil {
        log.Fatalln(err.Error())
    }
}

func dogHandler(rw http.ResponseWriter, req *http.Request) {
    fmt.Fprintf(rw, "<h1>dogs</h1><h2>dog dog dog</h2>")
}

func jsonResponseHandler(rw http.ResponseWriter, req *http.Request) {
    data := map[string]interface{}{
        "message": "hello golang",
        "status":  http.StatusOK,
    }

    // map to json
    bytes, err := json.Marshal(data)
    if err != nil {
        log.Fatal(err)
    }
    fmt.Fprint(rw, string(bytes))
}

func productResponseHandler(rw http.ResponseWriter, req *http.Request) {
    // product := Product{"商品A", 100, 10}
    product := Product{
        Name:     "商品A",
        Price:    100,
        Quantity: 10,
    }

    // struct to json byte
    bytes, err := json.Marshal(product)
    if err != nil {
        http.Error(rw, err.Error(), http.StatusInternalServerError)
        return
    }

    rw.Header().Set("Content-Type", "application/json")
    fmt.Fprint(rw, string(bytes))
}

func main() {
    // http.Handle("/hello", http.HandlerFunc返す(helloHandler))
    http.HandleFunc("/hello", helloHandler)
    http.HandleFunc("/dog", dogHandler)
    http.HandleFunc("/json", jsonResponseHandler)
    http.HandleFunc("/product", productResponseHandler)

    http.ListenAndServe(":3000", nil)
}
次はもう少しhttp.Requestに関してまとめて、フレームワークを使った場合どうなるか、というのもまとめていければと思います。
ではでは。
【Docker】ローカルにredisをインストールしたくないときの対処法
どうもてぃです。
railsの完全ローカル環境を構築しないといけなくなったんですが、いかんせんインストールするものが多い。
題名の通りredisをインストールするのは良いんですが、他のプロジェクトでdockerを使っててdocker-compose upした際にポートがぶつかるのが面倒くさい。
そういった面倒臭さやインストールする煩わしさ、インストール後の設定の憂鬱さを解決する方法を伝授します。
環境
% lsb_release -a
No LSB modules are available.
Distributor ID: LinuxMint
Description:    Linux Mint 19.3 Tricia
Release:    19.3
Codename:   tricia
- Docker version 19.03.6, build 369ce74a3c
TL; DR
$ docker pull redis

# requirepassはrails側で設定しているもの
$ docker run --name redis-container -d -p 6379:6379 redis redis-server --appendonly yes --requirepass password
データを永続化させたいとき
今回はただの開発環境でrailsのsidekiqのために必要であったため、特に永続化は気にしてません。
ですが、永続化させたくてどうしようもない方のために…
リファレンスを乗せときます\(^o^)/
dockerのリファレンスは神なのでぜひ見ましょうね…
冗談です。
以下のコマンドでたぶんいけます。
$ docker run --name redis-container -d -p 6379:6379 -v redis-data:/data redis redis-server --appendonly yes --requirepass password
おわりに
docker run オプションについては自分の過去記事を漁ってもらうか、安心と信頼のとても見やすいリファレンスを確認するとよいです。
redis以外にも入れたくないものがあればdockerで同じように対応してみるとdockerに慣れていけるんじゃないでしょうかね。
最後にdockerリファレンスのリンク貼っときますね。
【PostgreSQL】rails db:create時にrole <name> does not existsが出たときの備忘録

どうもてぃ。
久々にローカルDB環境を作ってて10分ほどハマったので、二度とないように備忘録書いときます。
環境
% cat /etc/lsb-release
DISTRIB_ID=LinuxMint
DISTRIB_RELEASE=19.3
DISTRIB_CODENAME=tricia
DISTRIB_DESCRIPTION="Linux Mint 19.3 Tricia"
database.ymlの設定
config/database.ymlはこんな感じ。
default: &default
  adapter: postgresql
  encoding: unicode
  pool: <%= ENV.fetch("RAILS_MAX_THREADS") { 5 } %>

development:
  <<: *default
  database: <%= ENV['POSTGRES_DB'] %>

# Warning: The database defined as "test" will be erased and
# re-generated from your development database when you run "rake".
# Do not set this db to the same as development or production.
test:
  <<: *default
  database: <%= ENV['POSTGRES_DB_TEST'] %>
usernameやpasswordは面倒くさかったので設定してません。
Let's rails db:create
% bundle exec rails db:create
% bundle exec rails db:create
FATAL:  role "motty" does not exist
Couldn't create 'project_dev' database. Please check your configuration.
rails aborted!
ActiveRecord::NoDatabaseError: FATAL:  role "motty" does not exist
/home/motty/github.com/project/vendor/bundle/ruby/2.6.0/gems/activerecord-5.2.4.3/lib/active_record/connection_adapters/postgresql_adapter.rb:696:in `rescue in connect'
/home/motty/github.com/project/vendor/bundle/ruby/2.6.0/gems/activerecord-5.2.4.3/lib/active_record/connection_adapters/postgresql_adapter.rb:691:in `connect'
/home/motty/github.com/project/vendor/bundle/ruby/2.6.0/gems/activerecord-5.2.4.3/lib/active_record/connection_adapters/postgresql_adapter.rb:223:in `initialize'
/home/motty/github.com/project/vendor/bundle/ruby/2.6.0/gems/activerecord-5.2.4.3/lib/active_record/connection_adapters/postgresql_adapter.rb:48:in `new'
/home/motty/github.com/project/vendor/bundle/ruby/2.6.0/gems/activerecord-5.2.4.3/lib/active_record/connection_adapters/postgresql_adapter.rb:48:in `postgresql_connection'
/home/motty/github.com/project/vendor/bundle/ruby/2.6.0/gems/activerecord-5.2.4.3/lib/active_record/connection_adapters/abstract/connection_pool.rb:830:in `new_connection'
/home/motty/github.com/project/vendor/bundle/ruby/2.6.0/gems/activerecord-5.2.4.3/lib/active_record/connection_adapters/abstract/connection_pool.rb:874:in `checkout_new_connection'
/home/motty/github.com/project/vendor/bundle/ruby/2.6.0/gems/activerecord-5.2.4.3/lib/active_record/connection_adapters/abstract/connection_pool.rb:853:in `try_to_checkout_new_connection'
/home/motty/github.com/project/vendor/bundle/ruby/2.6.0/gems/activerecord-5.2.4.3/lib/active_record/connection_adapters/abstract/connection_pool.rb:814:in `acquire_connection'
/home/motty/github.com/project/vendor/bundle/ruby/2.6.0/gems/activerecord-5.2.4.3/lib/active_record/connection_adapters/abstract/connection_pool.rb:538:in `checkout'
/home/motty/github.com/project/vendor/bundle/ruby/2.6.0/gems/activerecord-5.2.4.3/lib/active_record/connection_adapters/abstract/connection_pool.rb:382:in `connection'
/home/motty/github.com/project/vendor/bundle/ruby/2.6.0/gems/activerecord-5.2.4.3/lib/active_record/connection_adapters/abstract/connection_pool.rb:1033:in `retrieve_connection'
/home/motty/github.com/project/vendor/bundle/ruby/2.6.0/gems/activerecord-5.2.4.3/lib/active_record/connection_handling.rb:118:in `retrieve_connection'
/home/motty/github.com/project/vendor/bundle/ruby/2.6.0/gems/activerecord-5.2.4.3/lib/active_record/connection_handling.rb:90:in `connection'
/home/motty/github.com/project/vendor/bundle/ruby/2.6.0/gems/activerecord-5.2.4.3/lib/active_record/tasks/postgresql_database_tasks.rb:12:in `connection'
/home/motty/github.com/project/vendor/bundle/ruby/2.6.0/gems/activerecord-5.2.4.3/lib/active_record/tasks/postgresql_database_tasks.rb:21:in `create'
/home/motty/github.com/project/vendor/bundle/ruby/2.6.0/gems/activerecord-5.2.4.3/lib/active_record/tasks/database_tasks.rb:119:in `create'
/home/motty/github.com/project/vendor/bundle/ruby/2.6.0/gems/activerecord-5.2.4.3/lib/active_record/tasks/database_tasks.rb:139:in `block in create_current'
/home/motty/github.com/project/vendor/bundle/ruby/2.6.0/gems/activerecord-5.2.4.3/lib/active_record/tasks/database_tasks.rb:316:in `block in each_current_configuration'
/home/motty/github.com/project/vendor/bundle/ruby/2.6.0/gems/activerecord-5.2.4.3/lib/active_record/tasks/database_tasks.rb:313:in `each'
/home/motty/github.com/project/vendor/bundle/ruby/2.6.0/gems/activerecord-5.2.4.3/lib/active_record/tasks/database_tasks.rb:313:in `each_current_configuration'
/home/motty/github.com/project/vendor/bundle/ruby/2.6.0/gems/activerecord-5.2.4.3/lib/active_record/tasks/database_tasks.rb:138:in `create_current'
/home/motty/github.com/project/vendor/bundle/ruby/2.6.0/gems/activerecord-5.2.4.3/lib/active_record/railties/databases.rake:29:in `block (2 levels) in <main>'
/home/motty/github.com/project/vendor/bundle/ruby/2.6.0/gems/railties-5.2.4.3/lib/rails/commands/rake/rake_command.rb:23:in `block in perform'
/home/motty/github.com/project/vendor/bundle/ruby/2.6.0/gems/railties-5.2.4.3/lib/rails/commands/rake/rake_command.rb:20:in `perform'
/home/motty/github.com/project/vendor/bundle/ruby/2.6.0/gems/railties-5.2.4.3/lib/rails/command.rb:48:in `invoke'
/home/motty/github.com/project/vendor/bundle/ruby/2.6.0/gems/railties-5.2.4.3/lib/rails/commands.rb:18:in `<main>'
/home/motty/github.com/project/vendor/bundle/ruby/2.6.0/gems/bootsnap-1.4.6/lib/bootsnap/load_path_cache/core_ext/kernel_require.rb:23:in `require'
/home/motty/github.com/project/vendor/bundle/ruby/2.6.0/gems/bootsnap-1.4.6/lib/bootsnap/load_path_cache/core_ext/kernel_require.rb:23:in `block in require_with_bootsnap_lfi'
/home/motty/github.com/project/vendor/bundle/ruby/2.6.0/gems/bootsnap-1.4.6/lib/bootsnap/load_path_cache/loaded_features_index.rb:92:in `register'
/home/motty/github.com/project/vendor/bundle/ruby/2.6.0/gems/bootsnap-1.4.6/lib/bootsnap/load_path_cache/core_ext/kernel_require.rb:22:in `require_with_bootsnap_lfi'
/home/motty/github.com/project/vendor/bundle/ruby/2.6.0/gems/bootsnap-1.4.6/lib/bootsnap/load_path_cache/core_ext/kernel_require.rb:31:in `require'
/home/motty/github.com/project/vendor/bundle/ruby/2.6.0/gems/activesupport-5.2.4.3/lib/active_support/dependencies.rb:291:in `block in require'
/home/motty/github.com/project/vendor/bundle/ruby/2.6.0/gems/activesupport-5.2.4.3/lib/active_support/dependencies.rb:257:in `load_dependency'
/home/motty/github.com/project/vendor/bundle/ruby/2.6.0/gems/activesupport-5.2.4.3/lib/active_support/dependencies.rb:291:in `require'
bin/rails:4:in `<main>'
postgresqlをインストールした後なにもしてなかったので、ロールがないって怒られちゃいました。
roleを作成する
まずはポスグレの中に入ります
% sudo -u postgres psql
psql (10.14 (Ubuntu 10.14-0ubuntu0.18.04.1))
Type "help" for help.

postgres=#
ロールの確認をすると
postgres=# \du
                                   List of roles
 Role name |                         Attributes                         | Member of
-----------+------------------------------------------------------------+-----------
 postgres  | Superuser, Create role, Create DB, Replication, Bypass RLS | {}
mottyっていうロールないですね(そりゃそうだわ)
てなわけで作りま。
postgres=# create role motty login createdb createrole password 'password';
CREATE ROLE

postgres=# \du
                                   List of roles
 Role name |                         Attributes                         | Member of
-----------+------------------------------------------------------------+-----------
 motty     | Create role, Create DB                                     | {}
 postgres  | Superuser, Create role, Create DB, Replication, Bypass RLS | {}
完璧にロールmottyが作成できました。
\qで戻れます。
おわり
rails db:createも無事に通りました。
普段自分が作ったdocker templateを使用してるので、まさかこんなところでハマるとは思ってませんでした。
もう二度とローカル環境構築とかいう無駄なことはやりたくないなぁ、と思う今日この頃でした。
おしまい。
【備忘録】asdf install rubyが出来ない時の対処法
どうもてぃ。
バージョン管理でasdfを使っているのですが、最新バージョンの言語をとってこようとした際にエラーになったので対処法を書いときます。
TL; DR
$ asdf plugin-update ruby

$ asdf install ruby 2.6.6
対処法はissueを探す
同じようなこと起きてる人たくさんいました。
$ asdf install ruby 2.6.6
ruby-build: definition not found:2.6.6
単にruby 2.6.6がインストールの候補に入ってないみたいでしたね。
終わり
他の言語で同じ現象がおきたときの対処策として備忘録書いときました。
なるべくわすれないように。
【Golang】超絶簡素なwebサーバーを作る その2

どうもてぃです。
前回の記事がこちら。
今回はhandlerを作成して、html要素を返してみようと思います。
環境
- Linux Mint 19.3 Cinnamon
- go version go1.14.4 linux/amd64
前回の振り返り
前回と少し違いますが、http.HandlerFuncを用いた方法です。
package main

import (
    "fmt"
    "net/http"
)

func ServeHTTP(rw http.ResponseWriter, req *http.Request) {
    switch req.URL.Path {
    case "/dog":
        fmt.Fprintf(rw, "dog dog dog")
    case "/cat":
        fmt.Fprintf(rw, "cat cat cat")
    default:
        fmt.Fprintf(rw, "hello world")
    }
}

func main() {
    http.ListenAndServe(":8080", http.HandlerFunc(ServeHTTP))
}
http.ListenAndServeの第二引数にHandlerFuncを渡し、リクエストパスに応じて表示するものを変更していました。
http.HandleFuncを使う
今回はhttp.HandleFuncを使います。前回はhttp.HandlerFuncです。見間違えないように気をつけてね。
まず/helloにHandleFuncを設定してみます。
package main

import (
    "net/http"
)

// 使わないので一旦コメントアウト
// func ServeHTTP(rw http.ResponseWriter, req *http.Request) {
//     switch req.URL.Path {
//     case "/dog":
//         fmt.Fprintf(rw, "dog dog dog")
//     case "/cat":
//         fmt.Fprintf(rw, "cat cat cat")
//     default:
//         fmt.Fprintf(rw, "hello world")
//     }
// }

func helloHandler(rw http.ResponseWriter, req *http.Request) {
}

func main() {
    http.HandleFunc("/hello", helloHandler)
    http.ListenAndServe(":8080", nil)
}
http.HandleFuncのgodocを見てみるとわかりますが、第一引数はパス、第二引数はhandlerをわたします。
一応参考に引っ張ってくると
// HandleFunc registers the handler function for the given pattern
// in the DefaultServeMux.
// The documentation for ServeMux explains how patterns are matched.
func HandleFunc(pattern string, handler func(ResponseWriter, *Request)) {
    DefaultServeMux.HandleFunc(pattern, handler)
}
http.ResponseWriterと*http.Requestを引数にもった関数のhandlerを渡せば良いので、helloHandlerのような形で今後も関数を作成していきます。
この状態で前回設定したairを起動し、localhost:8080/helloアクセスすると何も表示されていないページが出てくると思います。
それ以外のパス(例えばアプリケーションルート)にアクセスすると、404 page not foundが返ってきます。
これは前回の記事にも書いた、http.ListenAndServeの第二引数にnilを渡しておくと、設定してないパスにアクセスした際、内部的にNotFoundの関数が返るようになっているためです。
実際にFprintfで表示する
helloHandlerで実際に文字を表示してみます。
前回の記事をやってればだいたいわかります。
package main

import (
    "fmt"
    "net/http"
)

func helloHandler(rw http.ResponseWriter, req *http.Request) {
    fmt.Fprintf(rw, "<h1>hello golang</h1>")
}

func main() {
    http.HandleFunc("/hello", helloHandler)

    http.ListenAndServe(":8080", nil)
}
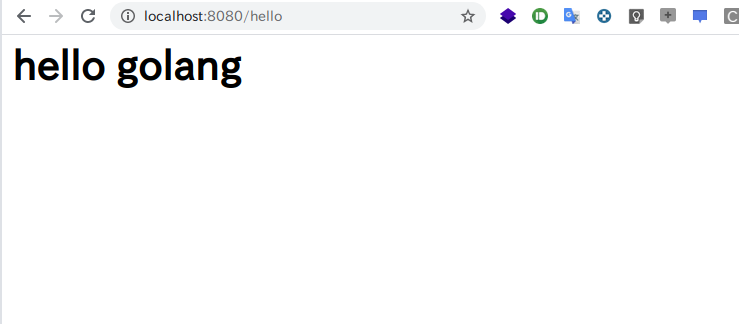
はい、簡単。
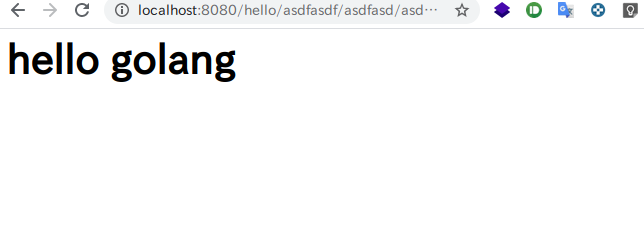
ちなみに、http.HandleFunc("/hello/", helloHandler)としておくと、localhost:8080/hello/asdfasd/qwerqw/asdfasとかにアクセスしても<h1>hello golang</h1>が表示されます。
こんな感じ。
html要素を複数渡す
まずはhelloHandlerに直接書いてみます。
func helloHandler(rw http.ResponseWriter, req *http.Request) {
    fmt.Fprintf(rw, `
      <!DOCTYPE html>
      <html lang="en">
          <head>
              <meta charset="UTF-8">
              <title>golang practice</title>
          </head>
          <body>
              <h1>hello golang</h1>
          </body>
      </html>
  `)
}
文字列が複数行に渡る場合は、バッククォートでかけばおkです。
他にもhandlerを追加してみます。
package main

import (
    "fmt"
    "net/http"
)

func helloHandler(rw http.ResponseWriter, req *http.Request) {
    fmt.Fprintf(rw, `
      <!DOCTYPE html>
      <html lang="en">
          <head>
              <meta charset="UTF-8">
              <title>golang practice</title>
          </head>
          <body>
              <h1>hello golang</h1>
          </body>
      </html>
  `)
}

func dogHandler(rw http.ResponseWriter, req *http.Request) {
    fmt.Fprintf(rw, `
      <!DOCTYPE html>
      <html lang="en">
          <head>
              <meta charset="UTF-8">
              <title>golang practice</title>
          </head>
          <body>
              <h1>dogs</h1>
              <h2>dog dog dog</h2>
          </body>
      </html>
  `)
}

func main() {
    http.HandleFunc("/hello", helloHandler)
    http.HandleFunc("/dog", dogHandler)

    http.ListenAndServe(":8080", nil)
}
こんな感じで要素を直接渡すことで、bodyを書き換えたり、titleを書き換えたり出来ます。
html要素を関数化
上記2つのhandlerの場合、bodyしか変更がなく、html要素を毎回書くのはさすがに冗長すぎるので関数化します。
func htmlTemplate(title, body string) string {
    template := fmt.Sprintf(`
      <!DOCTYPE html>
      <html lang="en">
          <head>
              <meta charset="UTF-8">
              <title>%s</title>
          </head>
          <body>
              %s
          </body>
      </html>`, title, body)

    return template
}
関数をもうちょい良い感じに使うと
func htmlTemplate(title, body string) (template string) {
    template = fmt.Sprintf(`
      <!DOCTYPE html>
      <html lang="en">
          <head>
              <meta charset="UTF-8">
              <title>%s</title>
          </head>
          <body>
              %s
          </body>
      </html>`, title, body)
    return
}
こんな感じにかけます。
作成した関数を適応
実際に適応して整理したものがこちら。
package main

import (
    "fmt"
    "net/http"
)

func helloHandler(rw http.ResponseWriter, req *http.Request) {
    fmt.Fprintf(rw, htmlTemplate("golang practice", "<h1>hello golang</h1>"))
}

func dogHandler(rw http.ResponseWriter, req *http.Request) {
    fmt.Fprintf(rw, htmlTemplate("golang practice", "<h1>dogs</h1><h2>dog dog dog</h2>"))
}

func htmlTemplate(title, body string) (template string) {
    template = fmt.Sprintf(`
      <!DOCTYPE html>
      <html lang="en">
          <head>
              <meta charset="UTF-8">
              <title>%s</title>
          </head>
          <body>
              %s
          </body>
      </html>`, title, body)
    return
}

func main() {
    http.HandleFunc("/hello", helloHandler)
    http.HandleFunc("/dog", dogHandler)

    http.ListenAndServe(":8080", nil)
}
templateファイルを読み込む形へ変更
html要素を関数化しましたが、実際はテンプレートを読み込んで値をわたしてhandlerごとに表示するものを変更するほうがいいですよね。
てなわけで、htmlTemplate部分を別ファイルにして読み込むにします。
まずはmain.goと同じディレクトリにtemplate.htmlを作成して、以下の形で準備します。
<!DOCTYPE html>
<html lang="en">
<head>
  <meta charset="UTF-8">
  <title>{{.Title}}</title>
</head>
<body>
  {{.Body}}
</body>
</html>
これをgo側で読み込みます。
とりあえず、読み込み部分だけ書くと
var tpl *template.Template

func init() {
  tpl = template.Must(template.ParseFiles("template.html"))
}
func init()はfunc main()の前に動く初期化処理。
読み込んでキャッシュしたtplに対して操作をしていきます。
template.htmlに書いてある.Bodyと.Titleはstructをtemplate.htmlに渡しているので、structを作成する前提で進めます(structについても今度まとめる予定)。
package main

import (
    "fmt"
    "html/template"
    "log"
    "net/http"
)

type Article struct {
    Title string
    Body  template.HTML
}

var tpl *template.Template

func init() {
    tpl = template.Must(template.ParseFiles("template.html"))
}

func escapeHTML(html string) (tmpl template.HTML) {
    tmpl = template.HTML(html)

    return
}

func helloHandler(rw http.ResponseWriter, req *http.Request) {
    article := Article{
        Title: "golang practice",
        Body:  escapeHTML("<h1>hello golang</h1>"),
    }

    if err := tpl.ExecuteTemplate(rw, "template.html", article); err != nil {
        log.Fatalln(err.Error())
    }
}

func dogHandler(rw http.ResponseWriter, req *http.Request) {
    fmt.Fprintf(rw, "<h1>dogs</h1><h2>dog dog dog</h2>")
}

func main() {
    http.HandleFunc("/hello", helloHandler)
    http.HandleFunc("/dog", dogHandler)

    http.ListenAndServe(":3000", nil)
}
とりあえずコードだけ。
ちょっと記事が長くなってしまったので、helloHandlerだけ適応してます。
解説はまた次回その3をお楽しみに。
合わせてjsonの返し方も解説出来たらと思います。
ではでは。
【Golang】超絶簡素なwebサーバーを作る その1

どうもてぃ。
ある程度キャッチアップを終えたので少しずつアウトプットしていきます。
go初心者なのでお手柔らかにお願いします。
環境
- Linux Mint 19.3 Cinnamon
- go version go1.14.4 linux/amd64
ホットリロード環境を作る
ホットリロードとしてairを使用します。
導入は簡単。GitHubに書いてあるとおり。
一応丁寧に書いておくと
$ go get -u github.com/cosmtrek/air
で、airを使えるようにしたあと、今回作成するファイル(main.go)と同じディレクトリ内に.air.tomlを以下の形で配置するだけ。
# Config file for [Air](https://github.com/cosmtrek/air) in TOML format

# Working directory
# . or absolute path, please note that the directories following must be under root.
root = "."
tmp_dir = "tmp"

[build]
# Just plain old shell command. You could use `make` as well.
cmd = "go build -o ./tmp/main ."
# Binary file yields from `cmd`.
bin = "tmp/main"
# Customize binary.
full_bin = "APP_ENV=dev APP_USER=air ./tmp/main"
# Watch these filename extensions.
include_ext = ["go", "tpl", "tmpl", "html"]
# Ignore these filename extensions or directories.
exclude_dir = ["assets", "tmp", "vendor", "frontend/node_modules"]
# Watch these directories if you specified.
include_dir = []
# Exclude files.
exclude_file = []
# This log file places in your tmp_dir.
log = "air.log"
# It's not necessary to trigger build each time file changes if it's too frequent.
delay = 1000 # ms
# Stop running old binary when build errors occur.
stop_on_error = true
# Send Interrupt signal before killing process (windows does not support this feature)
send_interrupt = false
# Delay after sending Interrupt signal
kill_delay = 500 # ms

[log]
# Show log time
time = false

[color]
# Customize each part's color. If no color found, use the raw app log.
main = "magenta"
watcher = "cyan"
build = "yellow"
runner = "green"

[misc]
# Delete tmp directory on exit
clean_on_exit = true
↑ 手順にあるexampleをそのまま使用すればおkです。
とりあえずairの導入は完了。
localhost:8080にアクセスできるようにする
まずは、net/httpパッケージを用いて8080ポートにアクセスできるようにしてみます。
http.ListenAndServeを使うだけです。
package main

import "net/http"

func main() {
  http.ListenAndServe(":8080", nil)
}
これでおk。
airで立ち上げて、localhost:8080へアクセスすると…
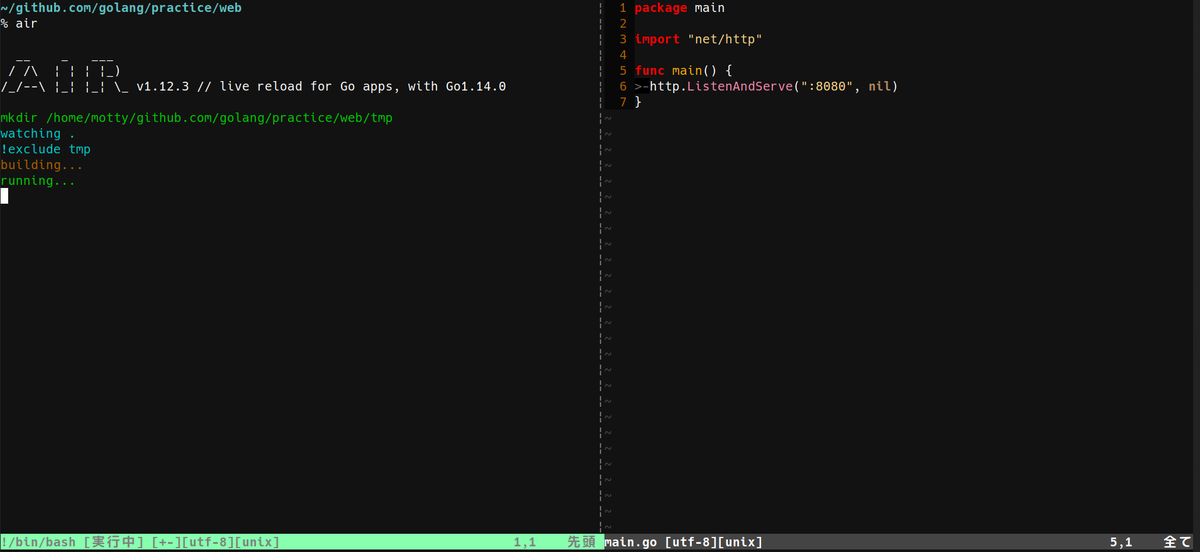

なんにも設定してないので、デフォルトで404が返ってきます。
ListenAndServeを確認してみる
初心者の方は飛ばしても大丈夫です。
http.ListenAndServeの定義を詳しく見ればわかるんですが、本当なら第二引数にはhandlerを渡します(厳密には違います)
// ListenAndServe always returns a non-nil error.
func ListenAndServe(addr string, handler Handler) error {
    server := &Server{Addr: addr, Handler: handler}
    return server.ListenAndServe()
}
こんな感じ。
さらにhandlerが使われてるServerを見てみると…
// A Server defines parameters for running an HTTP server.
// The zero value for Server is a valid configuration.
type Server struct {
    // Addr optionally specifies the TCP address for the server to listen on,
    // in the form "host:port". If empty, ":http" (port 80) is used.
    // The service names are defined in RFC 6335 and assigned by IANA.
    // See net.Dial for details of the address format.
    Addr string

    Handler Handler // handler to invoke, http.DefaultServeMux if nil

    // TLSConfig optionally provides a TLS configuration for use
    // by ServeTLS and ListenAndServeTLS. Note that this value is
    // cloned by ServeTLS and ListenAndServeTLS, so it's not
    // possible to modify the configuration with methods like
    // tls.Config.SetSessionTicketKeys. To use
    // SetSessionTicketKeys, use Server.Serve with a TLS Listener
    // instead.
    TLSConfig *tls.Config
.
.
.
http.DefaultServeMux if nilらしいので辿っていくと
func (sh serverHandler) ServeHTTP(rw ResponseWriter, req *Request) {
    handler := sh.srv.Handler
    if handler == nil {
        handler = DefaultServeMux
    }
    if req.RequestURI == "*" && req.Method == "OPTIONS" {
        handler = globalOptionsHandler{}
    }
    handler.ServeHTTP(rw, req)
}
handlerがnilだったらDefaultServeMuxが入ってますね。
また、handlerに関して更にたどると
func (mux *ServeMux) handler(host, path string) (h Handler, pattern string) {
    mux.mu.RLock()
    defer mux.mu.RUnlock()

    // Host-specific pattern takes precedence over generic ones
    if mux.hosts {
        h, pattern = mux.match(host + path)
    }
    if h == nil {
        h, pattern = mux.match(path)
    }
    if h == nil {
        h, pattern = NotFoundHandler(), ""
    }
    return
}
handlerがnilだったらNotFoundHanlder()が実行されてるっぽい。おそらくmux.matchj(path)のところでパスが存在しない場合もNotFoundが動いてそうな処理が書かれてる。
見てみると…
// NotFound replies to the request with an HTTP 404 not found error.
func NotFound(w ResponseWriter, r *Request) { Error(w, "404 page not found", StatusNotFound) }

// NotFoundHandler returns a simple request handler
// that replies to each request with a ``404 page not found'' reply.
func NotFoundHandler() Handler { return HandlerFunc(NotFound) }
NotFoundが返されてる。
辿っていくと、handlerがnilの際、実際にどういう処理が行われてるか、なんとなくわかるはずです。
ある程度プログラミング経験のある人はgodocを確認しながらやっていくと理解が深まるんじゃないでしょうか。
↓godoc
http.HandlerFuncを使う方法
これが一番簡単。
package main

import (
  "net/http"
  "fmt"
)

type handlerType int

func (t handlerType) ServeHTTP(rw http.ResposeWriter, req *http.Request) {
  fmt.Fprintf(rw, "hello world")
}

func main() {
  var t handlerType
  http.ListenAndServe(":8080", t)
}
main.goとして保存。
localhost:8080にアクセスするとhello worldが表示されると思います。
パスに関しては設定していないので、どのパスにアクセスしても今の状態ではhello worldが表示されてしまいます。
↓こんな感じ
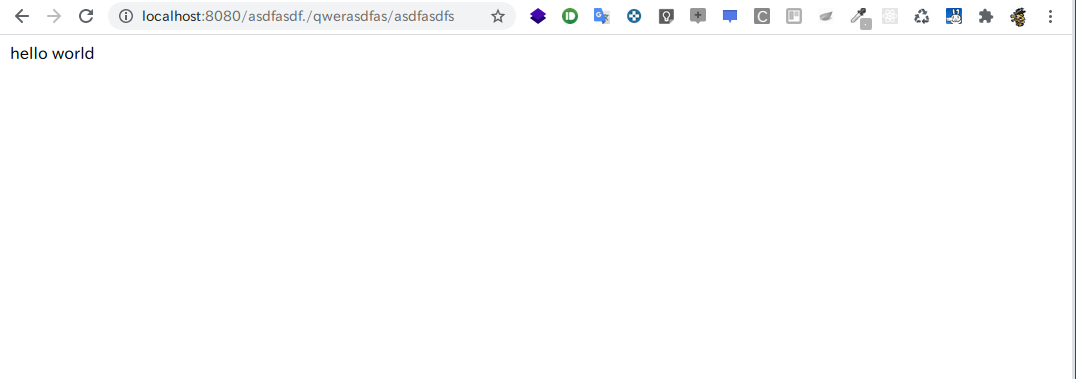
なので、それを改良していきます。
パスに応じて表示するものを変更する
ServeHTTPのreq *http.Requestを使用します。
package main

import (
    "fmt"
    "net/http"
)

type handlerType int

func (t handlerType) ServeHTTP(rw http.ResponseWriter, req *http.Request) {
    switch req.URL.Path {
    case "/dog":
        fmt.Fprintf(rw, "dog dog dog")
    case "/cat":
        fmt.Fprintf(rw, "cat cat cat")
    default:
        fmt.Fprintf(rw, "default")
    }
}

func main() {
    var t handlerType
    http.ListenAndServe(":8080", t)
}
かなり簡単ですが、req.URL.Pathでパスを取得して、switch表示するものを変更しているだけです。
localhost:8080/dog・localhost:8080/cat・localhost:8080にアクセスして確認してみるとswitchで評価されたパスによって表示されるものが変わるーといった感じです。
終わり
簡単すぎたので、次はhttp.HandleFuncを使って良い感じにやっていければと思います。
今週中にその2書く予定ですのでお楽しみに。
【Golang】jsonをstructに変換したい

どうもてぃ。
絶賛golangをキャッチアップ中です。
APIとしてgolangを使用し、フロントエンドはnextjs/typescriptで自分で実装していく可能性があるのでどんどんアウトプットしていきます。
環境
やりたいこと
題の通り。
色んなサービスのAPIを触る際、受取側(golang)でstructを作ってやりたいが毎回作るのはめんどうくさい(ものによってはレスポンスめっちゃ多いのあるし)。
例えば、有名な決済サービスサイトstripeを例にしてみる。
{
  "id": "txn_1032HU2eZvKYlo2CEPtcnUvl",
  "object": "balance_transaction",
  "amount": 400,
  "available_on": 1386374400,
  "created": 1385814763,
  "currency": "usd",
  "description": "Charge for test@example.com",
  "exchange_rate": null,
  "fee": 42,
  "fee_details": [
    {
      "amount": 42,
      "application": null,
      "currency": "usd",
      "description": "Stripe processing fees",
      "type": "stripe_fee"
    }
  ],
  "net": 358,
  "reporting_category": "charge",
  "source": "ch_1032HU2eZvKYlo2C0FuZb3X7",
  "status": "available",
  "type": "charge"
}
The balance transaction objectのレスポンスはこんな感じで、まあまあ長いし同じように他のレスポンスのstructを作るとなると結構面倒くさい。
JSON-to-Goを使う
すばらしいサービスです。
jsonをstructに変換してくれます。
上のjsonを入れると
ttype AutoGenerated struct {
    ID           string      `json:"id"`
    Object       string      `json:"object"`
    Amount       int         `json:"amount"`
    AvailableOn  int         `json:"available_on"`
    Created      int         `json:"created"`
    Currency     string      `json:"currency"`
    Description  string      `json:"description"`
    ExchangeRate interface{} `json:"exchange_rate"`
    Fee          int         `json:"fee"`
    FeeDetails   []struct {
        Amount      int         `json:"amount"`
        Application interface{} `json:"application"`
        Currency    string      `json:"currency"`
        Description string      `json:"description"`
        Type        string      `json:"type"`
    } `json:"fee_details"`
    Net               int    `json:"net"`
    ReportingCategory string `json:"reporting_category"`
    Source            string `json:"source"`
    Status            string `json:"status"`
    Type              string `json:"type"`
}
こんな感じでstructに変換してくれます。
structの名前はデフォルトでAutoGeneratedになるので適宜変えるといい感じに出来ますね。
整理すると
type BalanceTransactionObject struct {
    ID           string      `json:"id"`
    Object       string      `json:"object"`
    Amount       int         `json:"amount"`
    AvailableOn  int         `json:"available_on"`
    Created      int         `json:"created"`
    Currency     string      `json:"currency"`
    Description  string      `json:"description"`
    ExchangeRate interface{} `json:"exchange_rate"`
    Fee          int         `json:"fee"`
    FeeDetails   []FeeDetails`json:"fee_details"`
    Net               int    `json:"net"`
    ReportingCategory string `json:"reporting_category"`
    Source            string `json:"source"`
    Status            string `json:"status"`
    Type              string `json:"type"`
}

type FeeDetails struct {
    Amount      int         `json:"amount"`
    Application interface{} `json:"application"`
    Currency    string      `json:"currency"`
    Description string      `json:"description"`
    Type        string      `json:"type"`
}
素晴らしすぎる。
おわり
記事書いたあとに気づいたんですが、JSON-to-GoのInline type Definitionsのチェックボックを外すと整理したstructと同じものを作成できますね。。。
まあ、そういう日もあるか。
備忘録的な感じなので、結構有名なサービスで他にも良いのあったらぜひぜひコメントお願いします。